部署网站到Github上使用的是Github Page功能。
一般来说,部署Hugo网站到Github Page的流程是这样的:
- 新建一个
Github Page的repo - 把网站源码部署到repo的一个分支,比如
source - 把网站的public文件部署到repo的
master分支
这种方法能同时备份网站源码和网站,但也有不足之处:
- 网站源码和生成的网站都处于公共分支,任何人都能查看
- 每次更新网站,得同时更新网站源码和生成网站,比较繁琐
因此,本文介绍如何使用Github Action,解决上面的两个不足之处。
基本思路
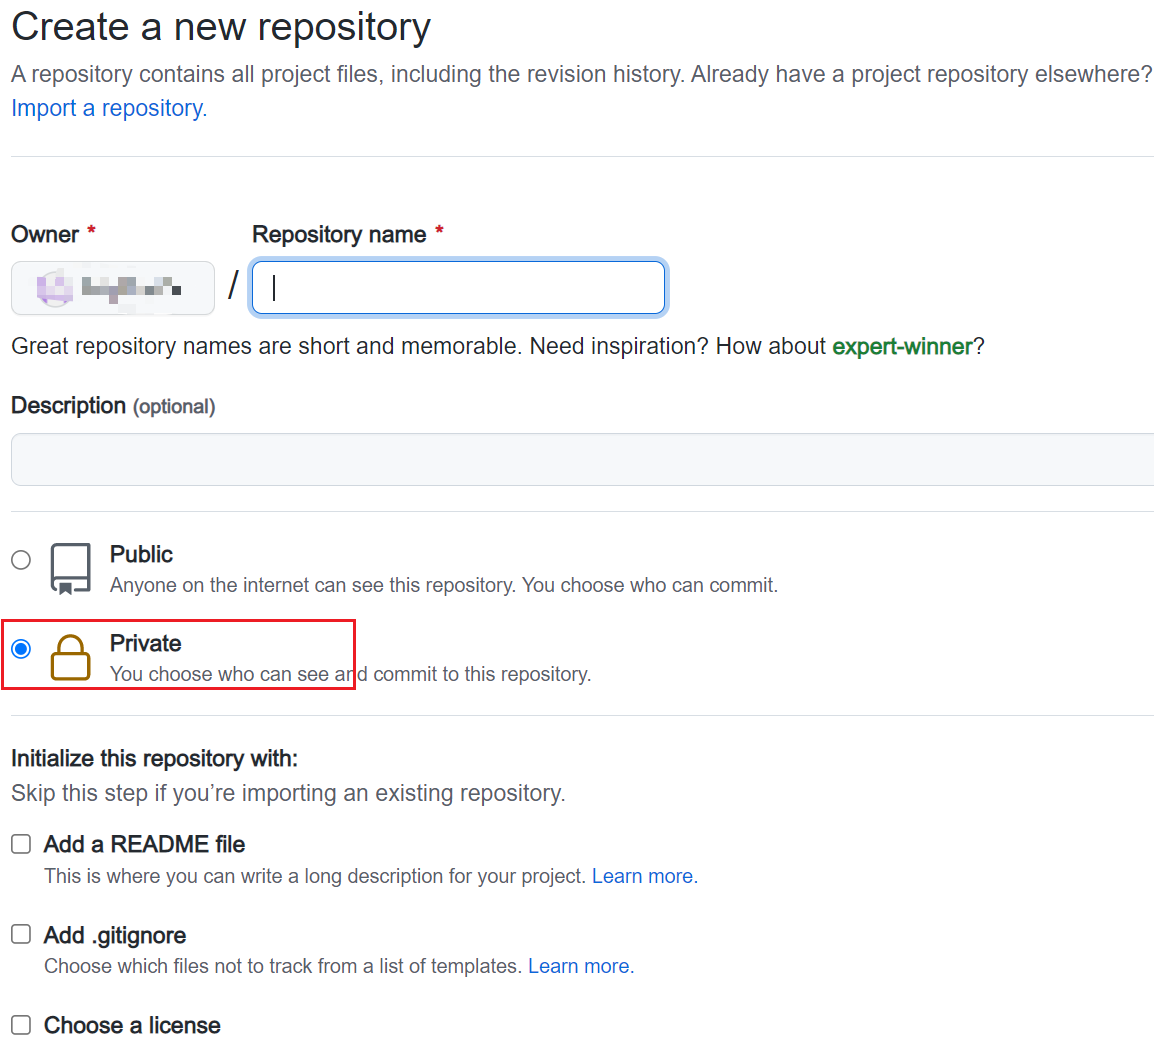
- 新建一个private repo(私人仓库),用于保存网站源码
- 设置
Github Action,每当private repo有提交时,就自动监测源码的变化、自动生成网站且自动发布到Github Page上。
这样,每次只需把网站源码提交到private repo就可以了,剩下的所有工作由Github Action来自动完成。
Github Action设置
生成Personal access tokens
由于源码是保存在私人仓库的,这里需要使用Personal access tokens来具备改写别的repo的权限。
点击头像下拉菜单-Settings-Developer Settings-Personal access tokens。
点击右侧的generate new token
 名字随便填,比如
ACTION_ACCESS_TOKEN
下方repo的所有选项全部选上:
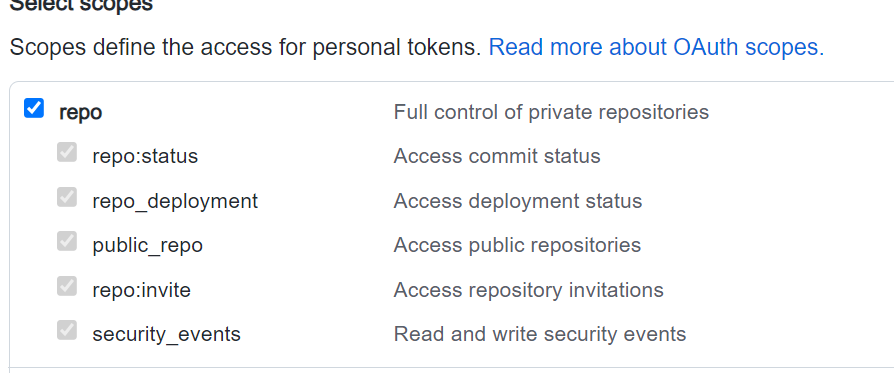
还有admin:repo_hook,全部选上:

生成的token保存好备用
私人仓库设置
新建一个私人仓库,名字随意
在此repo上,Settings-Secrets-New repository secret
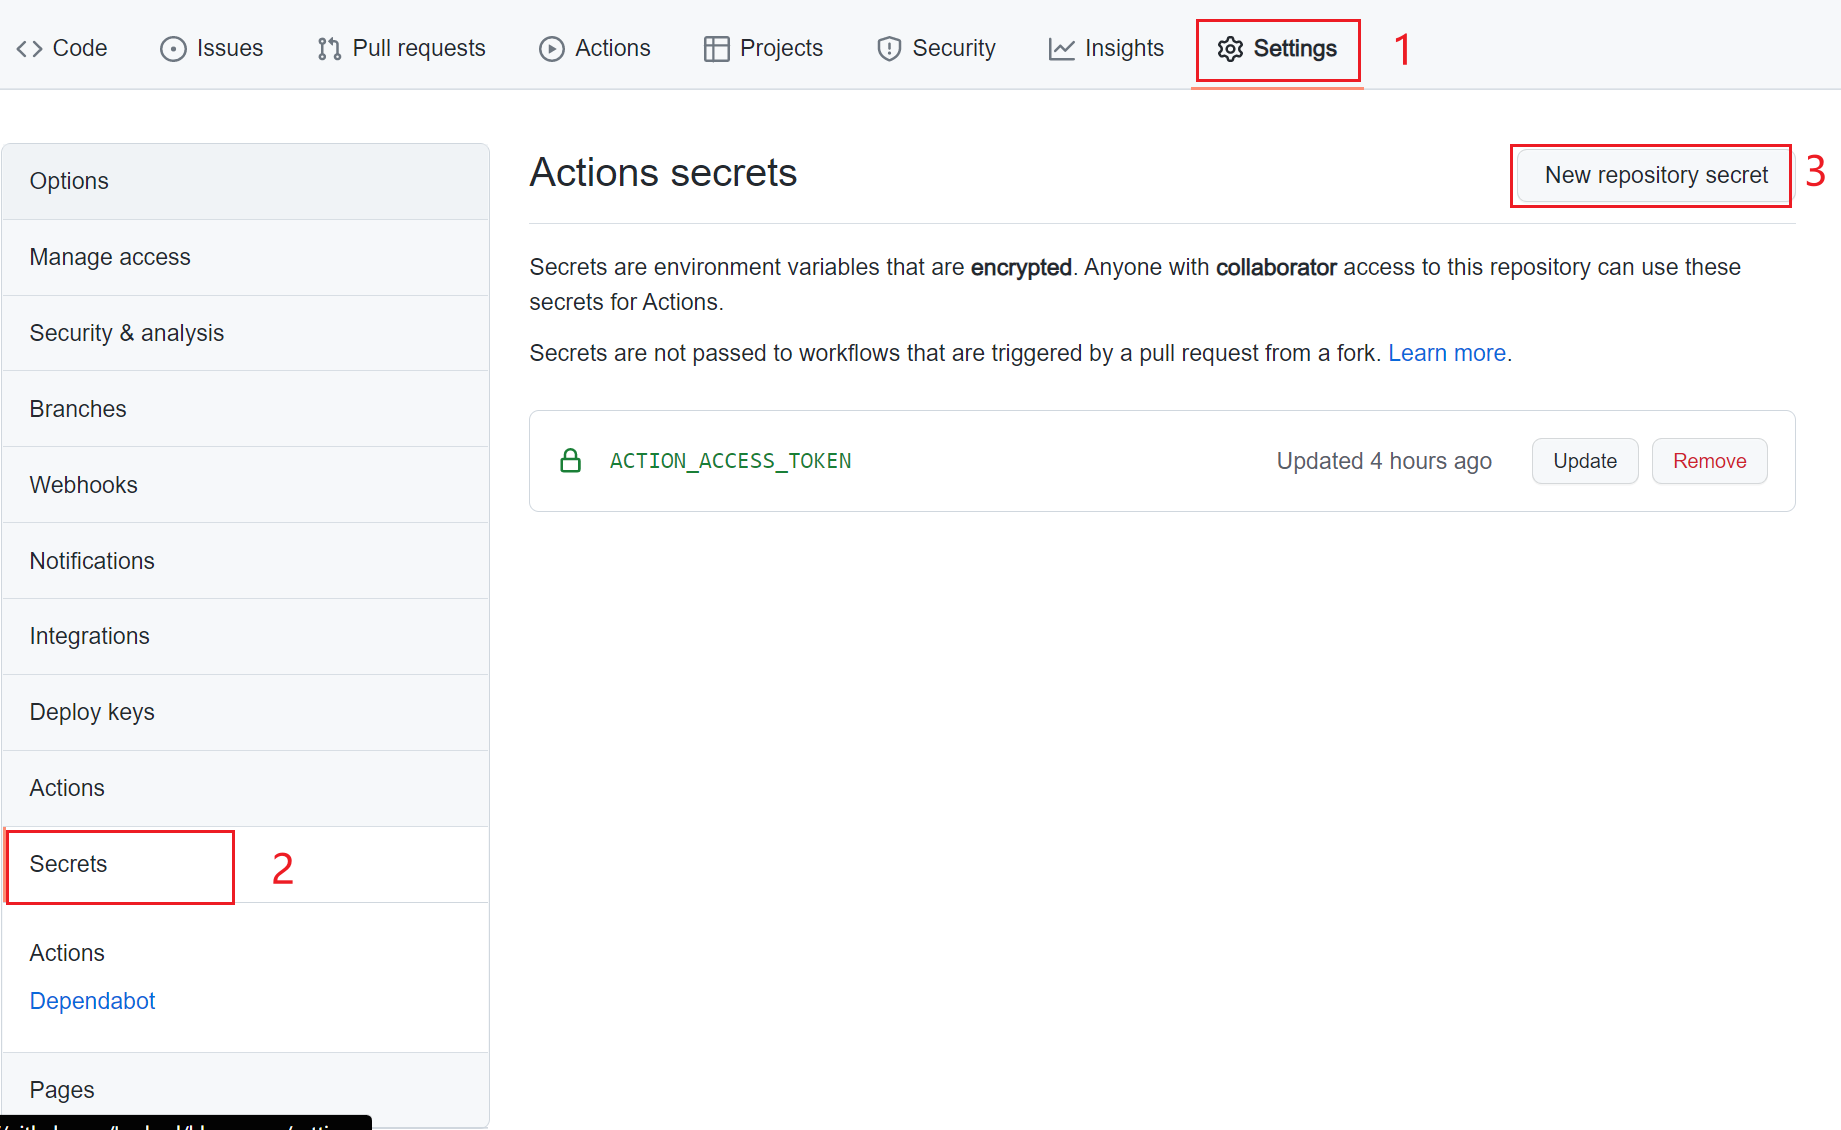
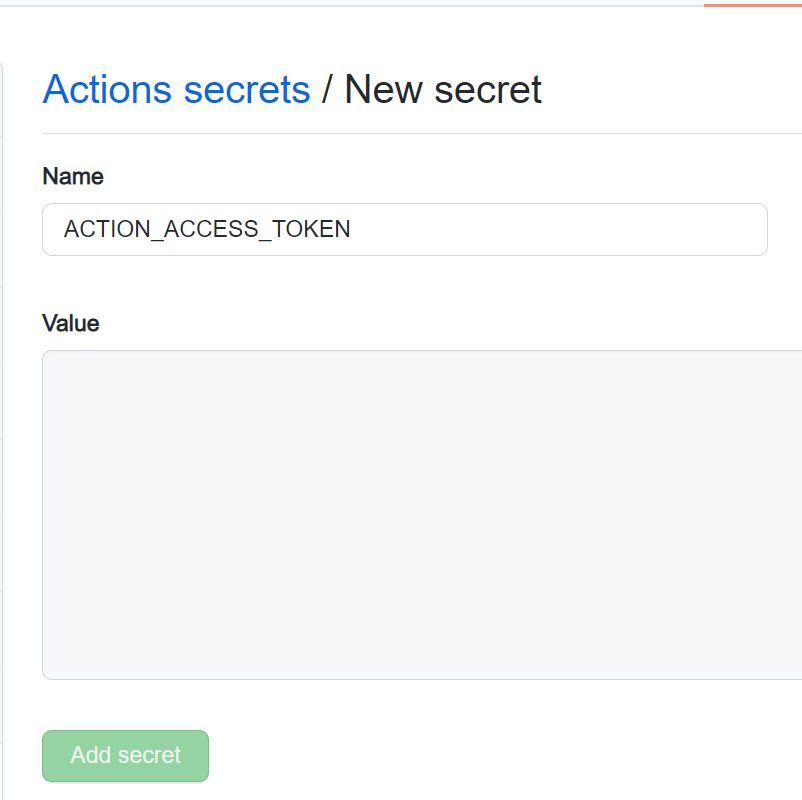
把刚才申请的Personal access tokens填写上。
Name必须和刚才申请Personal access tokens时填写的一致,比如ACTION_ACCESS_TOKEN
网站设置
在网站根目录里新建两个文件夹.github/workflows。
在workflows里新建一个后缀为.yml的文件,比如hugodeploy.yml(文件名自己随便取)。
hugodeploy.yml的内容如下:
 1
 2
 3
 4
 5
 6
 7
 8
 9
10
11
12
13
14
15
16
17
18
19
20
21
22
23
24
25
26
27
28
29
30
31
32
33
34
35
36
37
38
39
40
41
42
43
44
45
| name: HugoDeploy
on:
push:
branches:
- master # 这里的意思是当 master分支发生push的时候,运行下面的jobs
env:
TZ: Asia/Shanghai # 设置当前环境时区
jobs:
deploy: # 任务名自取
runs-on: ubuntu-20.04 # 在什么环境运行任务
steps:
- name: Checkout
uses: actions/checkout@v3 # 引用actions/checkout这个action,与所在的github仓库同名
with:
submodules: true # Fetch Hugo themes (true OR recursive) 获取submodule主题
fetch-depth: 0 # Fetch all history for .GitInfo and .Lastmod
- name: Disable quotePath
run: git config --global core.quotePath false
- name: Setup Hugo # 步骤名自取
uses: peaceiris/actions-hugo@v2 # hugo官方提供的action,用于在任务环境中获取hugo
with:
hugo-version: '0.99.1' # 获取最新版本的hugo
extended: true
- name: Cache resources # 缓存 resource 文件加快生成速度
uses: actions/cache@v3
with:
path: resources
# 检查照片文件变化
key: ${{ runner.os }}-hugocache-${{ hashFiles('content/**/*') }}
restore-keys: ${{ runner.os }}-hugocache-
- name: Build
run: hugo --minify # 使用hugo构建静态网页
- name: Deploy
uses: peaceiris/actions-gh-pages@v3 # 一个自动发布github pages的action
with:
# github_token: ${{ secrets.GITHUB_TOKEN }} 该项适用于发布到源码相同repo的情况,不能用于发布到其他repo
external_repository: yourname/yourname.github.io # 发布到哪个repo
personal_token: ${{ secrets.ACTION_ACCESS_TOKEN }} # 发布到其他repo需要提供上面生成的personal access token
publish_dir: ./public # 注意这里指的是要发布哪个文件夹的内容,而不是指发布到目的仓库的什么位置,因为hugo默认生成静态网页到public文件夹,所以这里发布public文件夹里的内容
publish_branch: master # 发布到哪个branch
|
需要改动的是:
external_repository: 填写自己的Github Page仓库地址
部署到Github
网站根目录下,执行下面命令,部署到远程私人仓库
1
2
3
4
| git remote add origin https://github.com/your_private_repo
git add .
git commit -m "Initial"
git push -u origin master
|
注意:git commit后面的"Initial"就是单次执行Github Action的任务名称。
查看运行情况
到私有仓库,点击Actions,查看Github Action的运行情况。
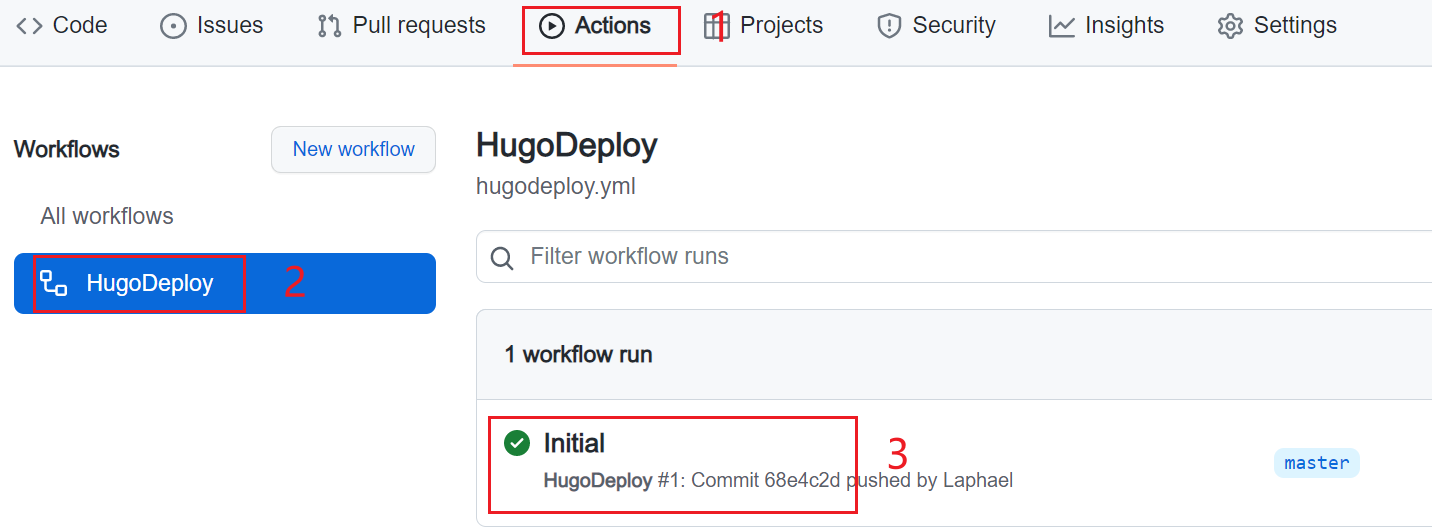
一切正常的话,在你的Github Page仓库里就能看到生成的网站了。